Are your baking pans1 getting mixed up? This causes inconsistent results and wastes valuable time. The right labeling method can bring order and efficiency back to your kitchen workflow2.
The best way to label baking pans1 depends on your needs. For temporary labels, use a high-temperature marker or heat-resistant tape3. For permanent branding, laser engraving4 is ideal. This can be done directly on the pan during manufacturing or by welding on a custom-made nameplate5 afterwards.

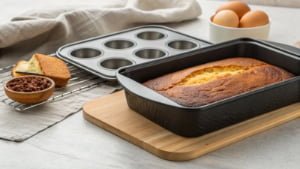
I've been in the baking equipment business for a long time, and this question comes up more than you might think. From small startup bakeries to massive food production plants, everyone needs a system. A simple label can make a huge difference in your daily operations. It helps you track pan usage, dedicate pans to specific products (like gluten-free), or simply keep your inventory organized6. Let's look at the different ways you can do this, starting with the simplest methods.
What are the easiest ways to label baking pans1 for temporary use?
Your staff is grabbing the wrong pan for a specific recipe. This mix-up can ruin a whole batch. You need a quick, cheap, and clear way to mark pans temporarily.
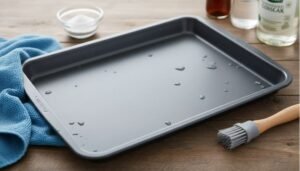
For simple, non-permanent labeling, you can write on the pan's edge with a high-temperature resistant oil-based marker. Or, for a cleaner option, apply heat-resistant masking tape to the pan first and then write on the tape. This lets you remove the label easily later.

These simple methods are perfect for day-to-day organization in a busy kitchen. I see many bakeries use these tricks to keep things running smoothly. For example, you might have different proofing times7 or baking temperatures for similar-looking products. A quick label on the pan's handle or rim solves this problem instantly.
Choosing Your Temporary Method
The choice between a marker and tape often comes down to personal preference and your specific use case. A marker is faster, but tape is cleaner and more versatile. It's important to use products rated for the temperatures of your ovens. Most industrial markers and tapes can handle temperatures up to 200-300°C, which covers most baking applications. However, always check the product specifications before you buy.
Here is a simple breakdown to help you decide:
| Method | Pros | Cons | Best For |
|---|---|---|---|
| High-Temp Marker | Very fast application. Low cost per pan. | Can be hard to remove. May look messy over time. | Quick identification, such as marking a pan for a specific dough. |
| High-Temp Tape | Easy to remove. Keeps the pan clean. Can be color-coded. | Slightly more effort to apply. Tape can peel off with wear. | Separating pans for allergens (e.g., gluten-free) or for different recipes. |
Always apply labels to the outside edge or handle of the pan. Never write on the inside baking surface. This prevents any chemicals from touching the food and avoids the label wearing off from cleaning or scraping.
How can you permanently add brand logos to your baking pans1?
You've invested in high-quality pans and want your brand on them. But stickers and markers look unprofessional and wear off. You need a permanent solution that reflects your brand's quality.
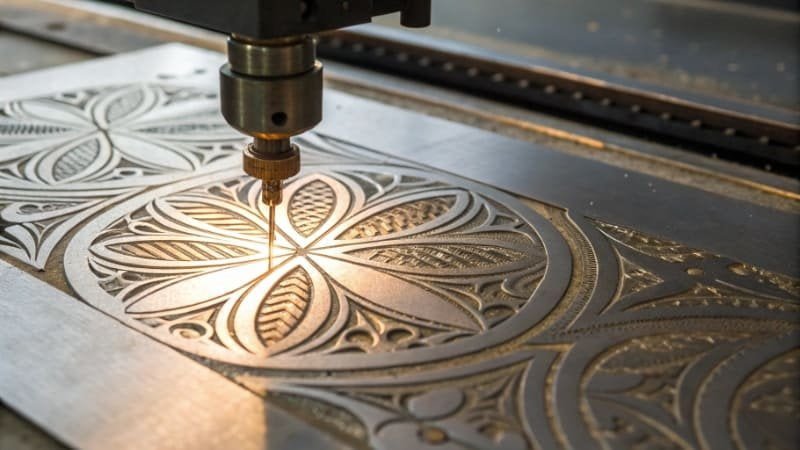
The most professional method for permanent branding is laser engraving4. You can have your logo, brand name, or other information etched directly onto the metal. This creates a clean, durable mark that will last as long as the pan itself. It looks great and reinforces your brand identity.

This is a premium option, and it's something we offer to our clients at KKbake. The key is to plan this during the manufacturing process. Adding laser engraving4 to a production run is much more efficient than doing it one pan at a time later. The result is a beautifully integrated mark that looks like it has always been part of the pan. It sends a message of quality and attention to detail.
The Details of Direct Laser Engraving
When you decide to go with laser engraving4, there are a few important things to consider. The process uses a high-powered laser to carefully remove a thin layer of the pan's surface material, creating a visible and permanent mark.
Placement is Everything
You must never engrave the inside baking surface of the pan.
- Food Safety: Engraving creates small grooves that can trap food particles and oil, making the pan difficult to clean and creating a hygiene risk.
- Coating Integrity: If your pan has a non-stick coating8, engraving will destroy it in that spot, leading to sticking and potential flaking of the coating into your food.
The best place for a logo is on the side, rim, or handle of the pan. This keeps the mark visible for inventory and branding purposes without interfering with the pan's function or safety.
Cost and Manufacturing
Direct laser engraving4 is most cost-effective when it's part of a large manufacturing order. Setting up the machine and design for a new logo has an initial cost. Spreading that cost over hundreds or thousands of pans makes the price per pan very reasonable. Trying to engrave pans after they've already been made is much more expensive and logistically complex. That is why I always discuss this option with clients when they are placing a new order.
Is there a smarter way to add professional, trackable labels?
Direct laser engraving4 is great, but the cost can be high for smaller orders. You need a permanent, professional label but want a more flexible and cost-effective method.
Yes, there is a smarter way. You can have separate nameplates created by a laser engraving4 specialist and then weld them onto your pans. This method gives you a permanent, high-quality label but often at a lower cost and with more flexibility than direct engraving.
I recently helped a client with this exact situation. He wanted to add a unique code to each pan for tracking purposes but was concerned about the cost of direct engraving. So, I connected him with a local laser engraving4 factory to make small metal tags with Data Matrix codes. We then welded these tags onto the side of each pan right here at our KKbake facility before shipping his order. He got a sophisticated tracking system on his new pans, and we helped him manage the process and keep his costs down.

Going Deeper with Welded Nameplates and DM Codes
This approach separates the pan manufacturing from the label creation, which is why it can be more affordable. You can order the pans and the nameplates from different specialists and combine them at the end. Welding is a quick and permanent way to attach the metal tag.
The client I mentioned chose a specific type of label: a Data Matrix Code9 (DM Code). This is a two-dimensional barcode that looks like a square or rectangle made of black and white cells. It's much more powerful than a simple line barcode.
Why Use a Data Matrix Code9?
A DM code can store a large amount of information in a very small space. This is perfect for the limited surface area on a baking pan. This technology opens up a new level of control for large-scale bakeries and food factories.
Here’s what makes them so useful in a professional baking environment:
| Feature | Benefit for Your Bakery |
|---|---|
| High Data Capacity | Store detailed information: pan purchase date, batch number, assigned recipe, cleaning cycles10, etc. |
| Small Physical Size | The code can be very small and still be readable, making it easy to fit on a pan's rim or handle. |
| High Fault Tolerance | The code can still be read even if it is partially damaged or scratched, which is common in a tough kitchen environment. |
| Easy to Read | Can be scanned quickly with a simple camera or smartphone, allowing staff to instantly access pan information. |
By using DM codes, my client could track the entire lifecycle of each pan. He could see how many times a pan was used, when it was last cleaned, and which products it was used for. This data helped him optimize his baking processes, improve quality control, and manage his inventory much more effectively. It’s a perfect example of how a simple label can become a powerful business tool.
Conclusion
Choosing how to label your baking pans1 is simple. From markers for daily tasks to advanced DM codes for full-scale tracking, there is a perfect solution for every bakery's budget and needs.
Explore this link to discover top-rated baking pans that enhance your baking experience and ensure consistent results. ↩
Learn tips and strategies to enhance your kitchen workflow and boost overall productivity. ↩
Discover the benefits of using heat-resistant tape for labeling and its applications in a busy kitchen. ↩
Explore the process of laser engraving and how it can provide a professional touch to your baking pans. ↩
Find resources on creating custom nameplates that can add a personal touch to your kitchen tools. ↩
Explore effective strategies for organizing your kitchen inventory to improve efficiency and workflow. ↩
Learn about proofing times for various dough types to ensure perfect baking results every time. ↩
Discover the science behind non-stick coatings and how they can improve your baking experience. ↩
Explore the advantages of using Data Matrix Codes for tracking and managing kitchen equipment. ↩
Find out how to implement cleaning cycles that ensure hygiene and efficiency in your bakery. ↩